Let’s be real for a second. If you’re running a large-scale EPC project or developing a utility-scale solar farm in 2026, you aren’t losing sleep over the price of a single bolt. You’re losing sleep over the “call-back.” You’re worried about that 2:00 AM phone call two years from now telling you a rail has warped or, worse, a module has cracked because the mounting system couldn’t handle a seasonal storm.
When we talk about common solar mounting installation mistakes, we’re really talking about a dual threat: the immediate spike in “Soft Costs” due to on-site rework and the long-term liability that eats your O&M budget alive. At SR Solar, we’ve seen it all. We’ve stepped into projects where the hardware was “fine,” but the execution was a disaster waiting to happen.
The truth is, your mounting system is the skeletal structure of your entire investment. If the bones aren’t right, the rest doesn’t matter. Let’s break down the four most critical technical oversights we see in the field today and, more importantly, how we can help you design them out of existence.
The High Cost of “Small” Mounting Errors in 2026
In today’s market, margins are tighter than ever. You can’t afford to do the same job twice. Yet, a huge chunk of project budgets still gets swallowed by preventable errors. Most common solar mounting installation mistakes happen not because of a lack of effort, but because of a lack of specific, site-adjusted engineering.
We often see teams treating mounting as a commodity—just some aluminum and steel to hold the “real” tech. But that “commodity” has to survive 25 years of baking heat, freezing snow, and gale-force winds. When it fails, it’s not just a hardware fix; it’s a massive hit to your reputation and your bottom line.
Mistake 1: Torque Management and the Fastener Fatigue Trap
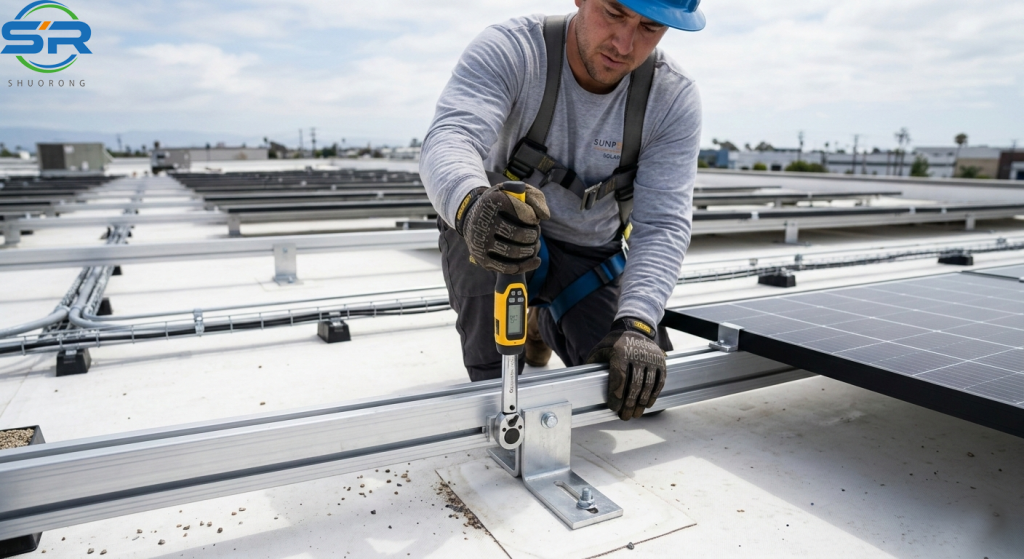
If I had a dollar for every time I saw a high-speed impact driver used blindly on a solar site, SR Solar would be funding its own space program. The most frequent of all common solar mounting installation mistakes is inconsistent torque.
It’s a classic Goldilocks problem. If your crew under-tightens, the constant “micro-vibrations” from wind loads will eventually back those bolts out. If they over-tighten—which is actually more common with powerful modern tools—they cause stress fractures in the aluminum rails (usually the AL6005-T5 grade we all love). Once that metal is stressed beyond its yield point, it’s only a matter of time before fastener fatigue sets in.
Why Over-tightening is Just as Bad as Under-tightening
Think of the rail like a guitar string. If it’s too loose, it won’t stay in place. If it’s too tight, it snaps. Over-torquing compromises the integrity of the anodized coating and the crystalline structure of the aluminum. You might not see the crack today, but after three seasons of thermal cycling, that bolt hole is going to fail.
The SR Solar Edge: Precision Specs and Smart-Alignment
At SR, we don’t leave this to chance. We provide precise torque specifications for every single component in your kit. We use high-grade SUS304 stainless steel bolts that are built to withstand the tension without stripping. Plus, our systems feature “smart-alignment” designs. This means the fasteners sit perfectly flush every time, significantly narrowing the window for human error even when your crew is trying to move fast to meet a deadline.
Mistake 2: The “One Size Fits All” Load Assumption
Terrain matters. A lot. One of the deadliest common solar mounting installation mistakes is failing to account for localized wind and snow load dynamics. Just because a system worked on a project in a flat valley doesn’t mean it’ll hold up on a coastal ridge or a high-altitude plateau.
We see “standard” spans being used in high-wind zones all the time. The result? Rail deflection. When the rail bends even slightly, it puts immense pressure on the solar modules themselves, leading to micro-cracking that kills your energy yield over time.
Ignoring Localized Wind and Snow Load Dynamics
Are you following AS/NZS 1170 or JIS C 8955? You should be. Local building codes aren’t just red tape; they are survival guides. Ignoring terrain categories or the “funneling” effect of nearby buildings is a recipe for structural failure.
How SR Solar Uses Site-Specific Structural Simulations
Every SR Solar partnership starts with a simulation. We don’t just ship you a box of parts. We look at your specific site coordinates and run structural models. We’ll customize the thickness of our rails and adjust the spacing of roof hooks or ground screws to match the exact pressure coefficients of your site. We’re building for 25+ years, not just until the next big storm.
Mistake 3: The Silent Killer—Galvanic Corrosion
Chemistry can be a cruel mistress. A very common but often “invisible” error among common solar mounting installation mistakes is improper material pairing. You’ve probably seen it: copper grounding wires clamped directly onto aluminum rails without a thought.
This creates a “galvanic cell.” In the presence of moisture (even just morning dew or humidity), the aluminum—being the less “noble” metal—will literally start to dissolve to protect the copper. In coastal areas, this process is on steroids. Within years, your grounding connection is gone, and your mounting structure is pitted and weak.
Mixing Incompatible Metals Without Isolation
It’s not just copper and aluminum. Even different grades of steel can react poorly if not properly isolated. This is why you’ll see “mysterious” rust on supposedly high-quality systems after just a few seasons.
Mistake 4: Weak Links in Long-Row Continuity
When you’re dealing with massive commercial or utility-scale arrays, the rails aren’t just single pieces; they are a series of segments that need to act as one. A massive but often overlooked entry in the list of common solar mounting installation mistakes is poor rail connectivity.
If your rail splices—the connectors that join two lengths of rail—are weak or improperly installed, the entire row loses its structural rigidity. Over time, gravity and wind pressure will cause the “sagging effect” at the joints. This doesn’t just look unprofessional; it creates uneven stress on the solar panels and can even lead to electrical grounding failures if the connection isn’t secure.

The Danger of Improperly Connected Rail Segments
In long-row installations, the rail acts as a continuous beam. If a connector is loose or of low quality, that beam is broken. During heavy wind events, these “weak spots” are the first to fail, often causing a domino effect across the entire array.
SR Solar Engineered Splices: Structural Integrity Meets Flexibility
At SR Solar, we don’t just “plug” rails together. Our engineered rail connectors are designed to be as strong as the rail itself. They ensure a flush, high-tension fit that maintains the structural continuity of the array while providing the necessary micro-flexibility to handle natural vibrations. Our splices are “click-and-lock” or high-torque designs that significantly speed up installation while ensuring that every meter of your array is as solid as the first.
Beyond Hardware: Reducing Soft Costs with Engineering Partners
At the end of the day, SR Solar isn’t just selling you aluminum and steel. We’re selling you a lower “Soft Cost.” By providing pre-assembled components and high-efficiency rail connectors, we can reduce your on-site labor time by up to 30%. That’s 30% less time your crew is on a roof or in a field, and 30% less opportunity for common solar mounting installation mistakes to occur.
When you partner with SR, you’re getting an engineering wing for your business. We help you stay compliant, stay profitable, and, most importantly, stay permanent.
Conclusion: Building for the Next 25 Years
Avoiding common solar mounting installation mistakes isn’t about working harder; it’s about working smarter. It’s about recognizing that torque, load dynamics, corrosion, and structural connectivity are the real enemies of your ROI. By focusing on these four areas—and choosing a partner like SR Solar that designs these risks out of the system—you ensure that your solar project is a legacy, not a liability.
FAQ: Navigating Solar Mounting Challenges
1. How much does rework from mounting mistakes actually cost?
Rework can easily double your labor costs for the affected section. Beyond the man-hours, you also have to factor in the cost of replacement hardware and the potential loss of generation revenue while the system is offline.
2. Can I use any stainless steel bolt for my aluminum rails?
Not necessarily. While SUS304 is the industry standard, the grade and the torque applied are critical. Always use the specific fasteners and torque settings provided by your mounting manufacturer to avoid fatigue.
3. Why is the rail connector so important for long rows?
The connector ensures the rail acts as a single, strong beam. If the connection is weak, wind and gravity will cause the rail to sag, which puts physical stress on the solar panels and can crack the glass.
4. How do SR Solar connectors speed up installation?
Our connectors are designed for “rapid-fit” installation. By reducing the number of loose parts and ensuring a perfect fit every time, your crew spends less time fiddling with bolts and more time moving the project forward.